This is part 2 of a 3 part series that describes in detail how to install artificial grass. The first artificial grass installation video covered sub-base preparation and the steps involved in securing a proper sub base. This second how-to includes steps related to the application of the artificial grass including unrolling, cutting and seaming your grass.
You can review part one, or check back to see part 3 next week. And for a comprehensive guide on how to install artificial grass on your own, download the DIY Easy Install Guide.
Unroll the Grass
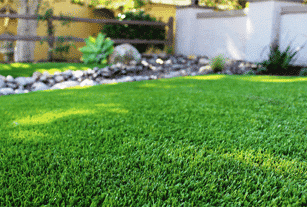
At the beginning of the project you’ll want to unroll your artificial grass. The grass has been rolled tightly so the fibers will be matted down. By unrolling your grass and allowing it to sit out in the sun for an hour or two, you’ll be letting the materials breathe and the fibers will begin to naturally stand up on their own.
Artificial grass, is by nature, a little bit expansive, so allowing the grass to sit unrolled in the sun allows the back to warm up and ensures you’ll get a good tight stretch during the installation process. Also, the warmer the backing, the more pliable the grass will be and the faster it will take to the shape of any undulations. Basically, it’s easier to work out any wrinkles when the grass and its backing are warmer.
It’s important to keep in mind that artificial grass has a grain to it and the grain always needs to be pointing in the same direction. As a general rule, you want the grain pointing toward the direction it is going to be viewed from most often.
So in front yards the grain should point towards the street, and in back yards it should point towards the house. In some instances, grain direction is determined by the layout that minimizes waste rather than where it will be viewed from most often.
Measure and Cut the Grass
Rough Cut the Edges
Put your artificial grass in place and rough cut the perimeter being sure to leave at least a couple inches of excess.
Seam the Grass
Seaming can be done in one of two primary ways. You can secure your seam with sod staples and nails or with seaming tape and glue. Using sod staples and nails is faster and lower cost, while seaming tape and glue is more expensive but this method is more robust. We recommend a moisture-cured glue specifically designed for artificial grass.
When seaming you want to pay particular attention to the distance between the adjoining stitch rows. Pay attention to the gauge – this is the distance between stitch rows – which is normally 3/8″.
When preparing your pieces to seam, you want to ensure you maintain that gauge. If you are too close to the edges the grass will bunch up and the seam will be noticeable. If you’re too far apart, there will be a gap and the seam will also be visible.
Fine Cut the Edges
At this point you want to more precisely cut your perimeter. If you are using a Wonder Edge and you have about a half inch to work with. If you’re using a sub-grade Bend-A-Board, you want to cut the grass so that it extends one and a half to three-quarters inches beyond the perimeter on all edges where there is a constructed restraint (sidewalk, walkway, patio, driveway, etc.).
You’re leaving the excess so that you can tuck into the quarter inch gap you left between the sub-grade Bend-A-Board and the constructed edge. This creates a beautiful and natural-looking aesthetic that mimics the appearance of a freshly-edged lawn without any gap between the walkway or patio and the artificial grass.
Securing the Grass
Tuck the Edges
Using a chisel, tuck the extra one and a half to three-quarters inch of articial grass into the gap between your sub-grade Bend-A-Board and the constructed edge.
Staple the Grass
Stapling the artificial grass to a sub-grade Bend-A-Board provides a secure and durable installation. We recommend using a one inch 18GA pneumatic staple done every inch along the perimeter.
If the sub-grade Bend-A-Board was not used, the perimeter is typically secured with a five inch nail every three inches. However, the concern with this type of installation method, although it is the quickest and least expensive, is that the nails may come loose over time.
The perimeter is the most vulnerable part of an artificial grass installation which is why it is often well worth the added expense to use the sub-grade Bend-A-Board perimeter.
Brushing the Grass
Brushing your grass can be done with a power broom, a stiff-bristled broom, or a Grandi rake. The sun will also play a part in helping the grass to stand up. This step also helps to prepare your artificial grass for the application of infill.
This concludes part two of the artificial grass installation tips series. Look out for part three to be published here to the Purchase Green blog over the next week. And for a comprehensive guide on how to install artificial grass on your own, download the DIY Easy Install Guide.