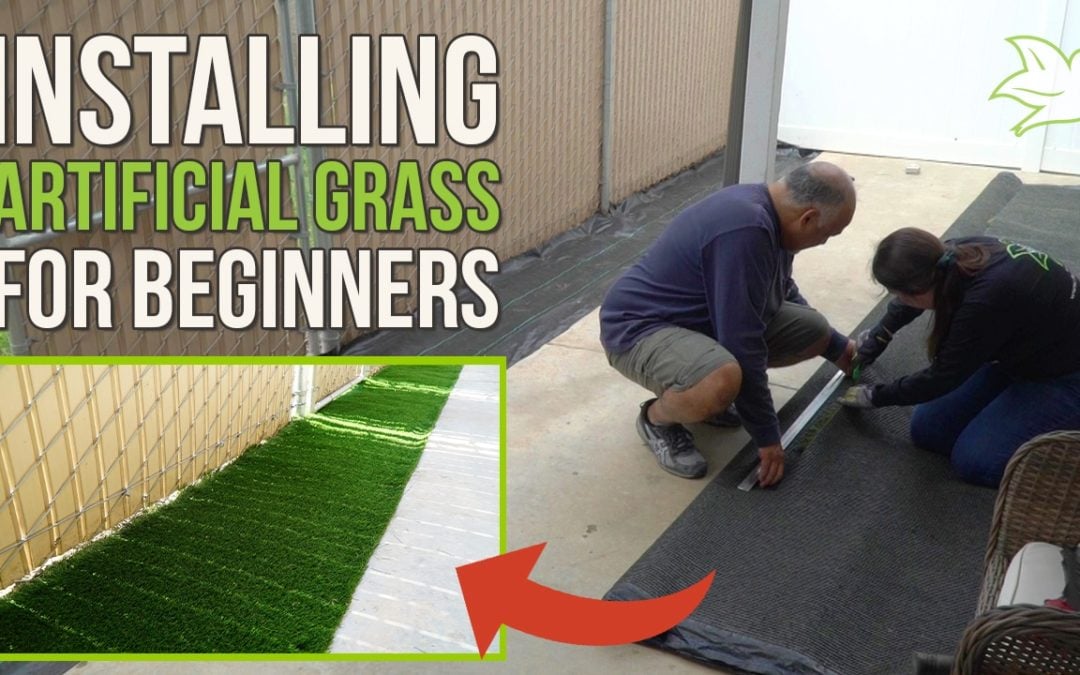
Are you a DIYer looking for guidance on how to start your artificial grass project? Or maybe you’ve already started and got stuck looking for the answers you need. It’s Shayla here with Purchase Green, and I’m happy to help! I’m going to take you through the steps of artificial grass installation DIY.
I’ve been wanting to do my own artificial grass installation DIY for a while. When my parents told me that they wanted some artificial grass for a dog run, I was super excited to help them out! I was finally going to be able to put into practice all of the knowledge I had been learning and writing about for months as a member of the Purchase Green marketing department.
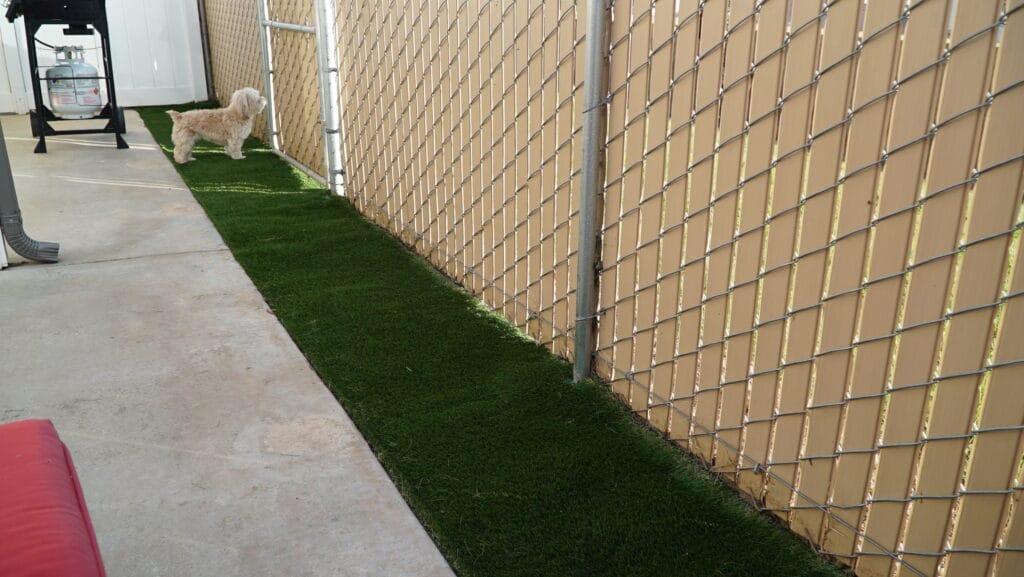
Before we get into it, I just want to iterate that every project is different. My project is a 50 square foot dog run, which is obviously a different experience from installing an entire backyard full of grass. However, the quantity of material and time taken are potentially the two biggest differences there may be between my project and yours.
Also, even though I work at Purchase Green, I am not an installer. As I researched for my project, I realized that a lot of the DIY artificial grass content out there is not actually DIY. I found that many of the DIY videos were done by entire professional installation crews. So I wanted to make sure that this project was actually do-it-yourself. I went through the whole process that an average DIYer would experience. I have never done anything like this before, but I’m going to try my best to outline everything that can help your DIY project go smoothly. So let’s jump into it!
Here’s a video of the entire process, starting with materials and going all the way through the finished product.

What You’ll Need
Here are all of the tools, accessories, and miscellaneous things we used for the installation broken out between things we already had at home and things we bought at Purchase Green:
We had:
- Square nosed shovel
- Bucket
- Measuring tape
- Gardening gloves
- Trash bags
- Cup
- Hammers
We bought:
- Infill (we used HeroFill)
- 10 lbs of 5″ nails
- 3.3’x33′ weed barrier
- Turf broom
- 8″ steel shears
- Carpet knife
- Arizona Pro remnants
- Turf Bomb (for future maintenance)
Because we wanted this to be as easy and low-cost as possible, we opted for a basic installation that doesn’t require any kind of perimeter product like Bend-a-Board. The basic installation isn’t as robust as far as securing the grass and making it look perfect, but my parents were just looking for a nice touch of green and wanted their dog to not track dirt and mud into the house. Easy enough! We followed along with the Purchase Green 2021 DIY Installation Guide. Let’s get into the backyard!
Site Walk & Prep
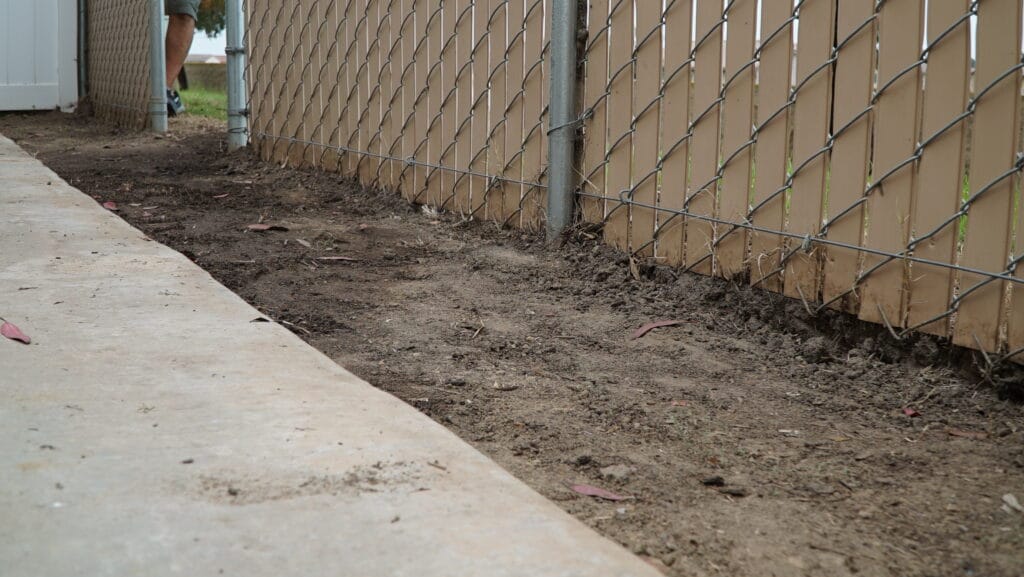
In the housing complex where my parents live, they can submit landscaping requests for free. There was a huge bed of dead plants and weeds in this space. Luckily, that was able to be taken care of by the complex, so we were left with this patch of dirt.
We started by measuring the dimensions of the space – 26’x2′. We knew we could save a ton of money by using remnants – and the space was small enough that we would have some great options. We had to keep in mind that Purchase Green doesn’t cut remnants – they come as-is. So we hopped on the remnants shop on the Purchase Green website and found our local store – San Marcos. When picking the right grass, I considered a few things:
- the square footage of the remnants and how they’d fit together
- if it was a good grass for dogs
- if it had Cool Yarn to keep the grass a little cooler when it’s in the sun
I ended up finding two Arizona Pro remnants that would fit great in the space and would work for their dog, Peaches. Arizona Pro is a Cool Yarn grass so it’ll reflect more heat from the sun, and it can withstand high traffic – perfect for Peaches! After picking our remnants, we moved onto tools and accessories – what we were going to need to actually install. Since our installation was only 50 sq.ft., we only needed one 10lb box of 5″ nails and the smallest roll of weed barrier. We decided that since our one seam was only going to be 2 feet long, we would just use nails instead of seaming tape and glue. Again, not as robust, but more cost and labor-effective. For our infill, we decided on HeroFill since it’s the best option for areas with pets. Regular silica infill stinks when pets use the area, but Herofill controls odors caused by pets, mildew, and mold – it’s also antimicrobial. We got two 50lb bags of infill, but we only ended up using one. We got a turf broom to brush up the fibers and get the infill down toward the backing. We also got a carpet knife to cut the remnants and 8″ shears to cut the weed barrier. And finally, we bought some Turf Bomb for added odor prevention and treatment down the road.
Excavation
After picking up all of our materials at the San Marcos store, we got it back to the house and finished excavating the site. We opted out of using a subbase for, once again, cost and labor reasons. If you have a bigger or unleveled space, or if you need a better drainage solution, I’d recommend subbase. Subbase also helps prevent weeds and movement of the turf, so it’s definitely something to consider. I think the finished product would’ve turned out a little better if we did have a subbase underneath, but we just didn’t want to deal with it.The recommended excavation depth is 3-4 inches with a subbase. Because we didn’t use subbase, we excavated about 2 inches below the cement line because our Arizona Pro grass is 1.7″ tall, and we didn’t want there to be a huge dip going from the patio to the grass. We removed as much organic material left in the dirt as we could because as that decomposes, the turf can shift and wrinkle. We compacted the soil with a square-nosed shovel. A hand tamper would’ve worked better, but we didn’t have one.
Underlayment
After we compacted the soil, it was time to lay the weed barrier. We nailed one side down first so it wouldn’t blow away, then rolled it out and folded it to fit the space. We used the whole roll and used the 8″ shears to cut around the fence poles and big concrete slabs along the fence. Then we nailed it down every foot or so along the perimeter.
Measuring, Cutting & Orienting
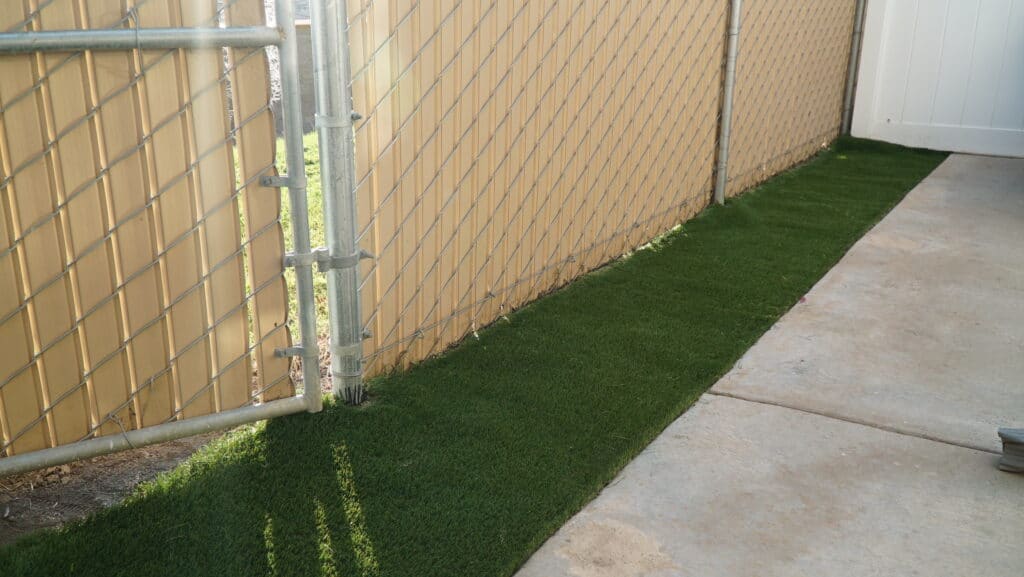
We brought in the Arizona Pro remnants and unrolled them to sit in the sun for a bit to get the blades to stand up. We wanted the grass grain to face the house, so we took the larger piece and lined up the already cut edge with the cement. We left overlap on the other sides because we were going to have to cut around some poles and concrete. Once we got it lined up how we wanted, we nailed down one side, stretched the other side and started cutting along the fence line. Definitely take your time measuring and cutting because once you make a cut, that’s it. We got our edges trimmed and started nailing everything down. We nailed every 6 inches along the perimeter and every foot down the middle. Something I found when nailing is that it’s important to try and keep the grass blades out from underneath the nail head. You want the nail to get right into the backing in between stitch rows, and if there are grass blades stuck underneath the nail, you can see the top of the nail in the ground.
Seaming
When it came to placing the other remnant, we made sure the grass grain was facing the same direction as the other one so that they’d look natural together. We lined up the cut edge the same as we did before and stretched it out and cut the overlap along the fence. Before we started nailing, we made sure that the edge along the fence would be the right length for the seam to line up. We got it all stretched and ready and started nailing the perimeter like before. When it came time to nail down the seam, I lined up the stitch rows so it’d look as seamless as possible, and started nailing every couple of inches in a staggered kind of zig-zag line. And it ended up looking pretty good, I was proud of myself!
Infill
After we finished all the nailing, we stepped back to admire our handiwork. And then went right into infill. We didn’t have a drop spreader or anything so we just used a big cup to disperse it. It worked pretty well and we were able to get into the corners easily. I’d walk back and forth dropping the infill and my stepdad would follow behind working the infill into the grass with the turf broom. It was some good teamwork!We got through the first bag of infill, and it seemed sufficient. Usually, you want 2-4 lbs of infill per square foot. Maybe we just wanted to be done, but opening a second 50lb bag of infill seemed like a lot, so we called it after one bag. We still have the second bag if we do decide to add some more later.
Finishing Up
After about 5 hours of work, we showed the finished lawn to my mom and their dog, Peaches. Peaches was suspicious at first, but she got used to it. Overall, we were all happy with how it turned out.
I’ve been to a handful of artificial grass installations and have gotten to watch the professional installers do their thing – and do it fantastically. After doing this little DIY installation, I cannot express enough how amazing our installers are at their jobs. It’s a tough job that takes incredible skill and attention to detail. I definitely learned a lot from this and I’m glad I get to share it with others trying to DIY their own project. In a nutshell, here are the key insights I’ve learned from my DIY project:
- Talk to an expert! Because I work at Purchase Green and maybe know more about artificial grass than the average DIYer, I had an advantage in knowing where to go for knowledge and resources, but everything I used is available to any other DIYer! The DIY Guide was an incredible tool, and I reached out to our installation experts to help me get an idea of all the materials I would need. You can absolutely reach out to your local Purchase Green to get expert advice and help if you’re feeling stuck. You can get all of your questions answered 100%.
- Manage your expectations! Going into this project, I knew it was not going to turn out how I’ve seen professional installations turn out. I know my skill level as far as landscaping experience goes – I have none. And I knew that we weren’t going to do a lot of the recommended methods for installation – like excavating, subbase, and perimeter board. So I knew it wasn’t going to be perfect. And I kept that in mind as I was installing. I sure did my best to make it look good and followed the directions, but in the end, the project is yours. You can decide the level you want to commit to making it look like a professional installation, whether that’s based on your budget, or labor, or something else.
- Have help! I worked on this project with my stepdad and it was so much better than if I tried to do it by myself. Not only does he know a lot more about landscaping than I do, but it was just more fun to work alongside someone. And it made it go by so much faster. I one-hundred percent recommend having a helper or putting together your own little installation crew to have it take less time.
- Choose the right remnants! I scoured the San Marcos remnant page for a long time before deciding on the Arizona Pros. I already knew that Arizona Pro would be a good grass for the dog, and I didn’t want remnants that were way too big or not big enough. They ended up being a nice width so we didn’t have to cut too much off, but we did end up having a lot of length left over. We made a nice doormat for the garage. If you do choose the remnant route, the thing to remember about remnants is that there isn’t the typical lifetime product warranty on them and they do come as-is, so you can’t have them cut when you pick them up in-store.
And that’s it! I hope you enjoyed going on this DIY journey with me, and I hope it shed some light on starting your artificial grass DIY project with realistic expectations. If you have any questions, feel free to call us at 844-TURF-444 or contact your local Purchase Green to get help. And don’t forget to check out the DIY Installation Guide to walk you through a proper artificial grass installation DIY!